Calendar
Schedule appointments, manage team availability, sync with Google Calendar, and let your AI agents handle the entire booking process — end to end.
The Link AI Calendar lets you schedule appointments, manage team availability, sync with external calendars, and let your AI agents handle the entire booking process — end to end.
Meet Customers Where They Are Calendar booking works wherever your customers are. Whether they're messaging on Instagram, Facebook, WhatsApp, calling on the phone, or chatting on your website — your agent books appointments seamlessly. No need for customers to visit a separate page.
What's New in v1.5
Version 1.5 introduces services and resources, Google Calendar integration, iCal sync, a smarter availability engine, and a redesigned booking experience for both your customers and your AI agents.
Services
You can now define multiple services per calendar. Instead of one generic appointment, you can offer Consultations, Follow-ups, Strategy Sessions, Demos — each with its own rules.
Every service can have:
- Custom duration — 15 minutes, 30 minutes, 2 hours, whatever fits
- Price — Display pricing for paid services
- Buffer time — Breathing room between back-to-back bookings
- Minimum advance notice — Prevent last-minute bookings
- Max bookings per slot — Allow group sessions or limit to 1:1
- Custom booking prompt — Tailor how your AI agent handles bookings for this service
- Custom confirmation message — Personalized confirmation per service type
- Google Meet — Automatically generate a Meet link when this service is booked
- Location — Set a default location per service
- Notes and duration questions — Optionally ask attendees for notes or preferred duration
Resources
Resources represent who or what is being booked — people, rooms, equipment, or vehicles. This unlocks team scheduling and asset management.
| Type | Use case |
|---|---|
| Person | Team members, consultants, therapists |
| Room | Meeting rooms, studios, offices |
| Equipment | Cameras, projectors, tools |
| Vehicle | Cars, vans, delivery vehicles |
Each resource can have its own weekly schedule, break times, an avatar, service associations, and individual time blocks for vacations or maintenance windows.
Three Resource Modes
| Mode | How it works |
|---|---|
| Single | One calendar, one schedule. Classic setup — no resources needed. |
| Pool | Multiple resources share availability. The system picks whoever is free. Great for "next available" scenarios. |
| Team | Each resource has their own schedule. Customers choose who they want. Ideal for selecting a specific team member. |
Google Calendar Integration
Connect your Google account to sync appointments both ways:
- Export to Google Calendar — New bookings appear in your Google Calendar automatically
- Google Meet links — Enable per-service to auto-generate video call links
- Conflict detection — Your Google Calendar events are respected when calculating availability
- Calendar selection — Choose which Google Calendar to sync with
iCal Sync
Import external calendars from any platform that supports iCal — Outlook, Apple Calendar, Calendly, and more:
- Add iCal URLs at the calendar level or per resource
- Configurable sync intervals (default: every 30 minutes)
- Imported events block availability automatically
- Supports multiple iCal feeds per calendar
Smarter Availability Engine
The availability system has been completely rebuilt:
- Timezone-aware — All availability is computed in your calendar's timezone
- Unified computation — One engine handles Single, Pool, and Team modes consistently
- Comprehensive results — Returns upcoming days with slot counts so your agent can suggest alternatives
- Conflict layering — Checks appointments, time blocks, buffer times, iCal events, and advance notice all at once
- Stay support — Date-range availability for stay-type bookings (hotels, rentals) with check-in/check-out handling
- AM/PM preference — Filter slots by morning or afternoon preference
Unified Booking System
- Appointment bookings — Time-based slots (consultations, meetings)
- Stay bookings — Date-range bookings with check-in and check-out (rentals, hotels)
- Source tracking — Every booking records how it was created: manually, by an AI agent, via a public booking page, or imported from iCal
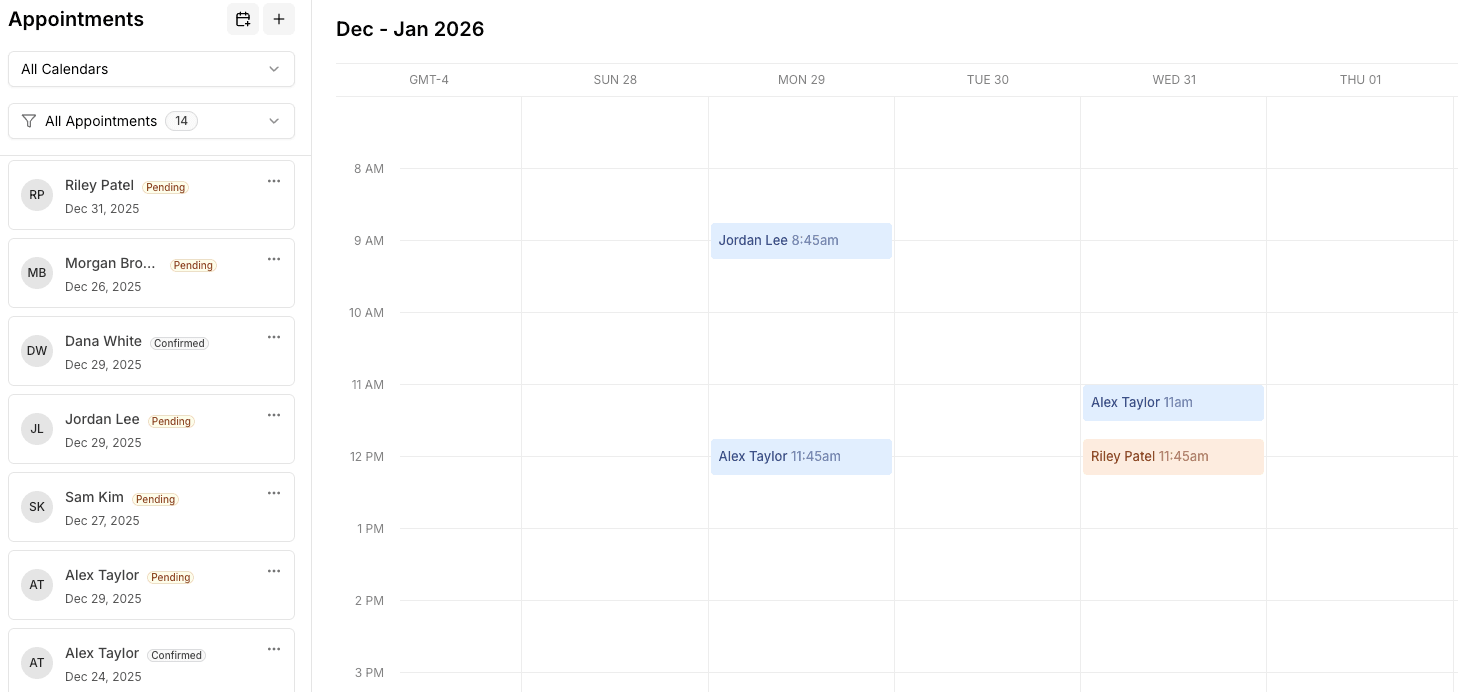
Redesigned Calendar Views
- Day, Week, and Month views for appointment calendars
- Stay calendar view for date-range bookings with resource visualization
- Appointment list sidebar with status filters and quick actions
- Drag-and-drop event management
- Time block management directly from the calendar view
How AI Agents Use the Calendar
Your AI agents follow a natural, step-by-step booking flow:
- List services — If your calendar has multiple services, the agent presents them and waits for the customer to choose
- Select resource — In Team mode, the agent shows available team members. In Pool mode, it picks automatically.
- Check availability — The agent finds open slots based on the customer's preferences (date, time of day, specific day)
- Present options — Available slots are shown with formatted times in your business timezone
- Collect info — The agent gathers the attendee's name, email, phone number, and any custom fields — one at a time, conversationally
- Book it — The appointment is created and confirmation is sent immediately
The agent handles natural language like "next available," "tomorrow afternoon," "next Monday," or specific dates and times.
Notifications & Reminders
Confirmation Notifications
When an appointment is booked, a confirmation is sent via your chosen channel:
- SMS — Text message with appointment details
- Email — Formatted email with an "Add to Calendar" button (Google Calendar, Outlook, Apple Calendar)
Automated Reminders
- Sent automatically before the appointment (default: 30 minutes before)
- Same channel as confirmations (SMS or email)
- Duplicate reminders are prevented automatically
Confirmation Workflow
If confirmation is required:
- Appointment is created with Pending status
- Confirmation notification is sent to the attendee
- Attendee confirms via the link in the notification
- Status changes to Confirmed
- If not confirmed within the timeout (default: 24 hours), the appointment is auto-cancelled
You can disable the confirmation requirement to auto-confirm all bookings.
Calendar Settings
Schedule Configuration
Set your availability per day of the week:
- Enable/disable specific days
- Custom start and end times per day
- Break times (lunch, etc.) per day
Booking Rules
| Setting | Default | Description |
|---|---|---|
| Default duration | 30 min | Default appointment length |
| Buffer between appointments | 15 min | Breathing room between bookings |
| Minimum advance notice | 60 min | How far in advance bookings must be made |
| Max bookings per slot | 1 | Allow overlapping bookings for group sessions |
| Require phone number | Yes | Whether phone is required during booking |
Stay Settings
For stay-type calendars:
- Check-in time — Default: 3:00 PM
- Check-out time — Default: 11:00 AM
Notification Settings
- Choose between SMS or email as your notification channel
- Enable/disable confirmations and reminders
- Set reminder time (minutes before appointment)
- Custom confirmation messages per service
Timezone
Your calendar's timezone determines how all times are displayed and computed. Set it once and everything — availability, booking times, notifications — uses it consistently.
Getting Started
Setting Up Services
- Open your calendar and go to Settings
- Navigate to the Services section
- Click Add Service
- Configure the service name, duration, price, and booking rules
- Optionally enable Google Meet for video call links
Setting Up Resources
- In calendar Settings, go to the Resources section
- Click Add Resource
- Choose a type (Person, Room, Equipment, Vehicle)
- Set their schedule and associate them with services
- Set your calendar's resource mode (Pool or Team)
Connecting Google Calendar
- In calendar Settings, find the Google Calendar section
- Click Connect Google Account
- Authorize Link AI to access your Google Calendar
- Select which calendar to sync with
- Toggle export on — new bookings will appear in Google Calendar
Adding iCal Feeds
- In calendar Settings, find the iCal Sync section
- Paste an iCal URL from your external calendar
- Optionally assign it to a specific resource
- Set the sync interval
- Events from the feed will block availability automatically
Frequently Asked Questions
Can I have multiple services with different durations?
Yes. Each service has its own duration, buffer time, and booking rules. A quick 15-minute check-in and a 2-hour strategy session can coexist on the same calendar.
What happens if all resources are busy?
In Pool mode, if no resources are available for a time slot, that slot won't appear as available. In Team mode, only the selected resource's availability matters.
Does Google Calendar sync work both ways?
Exported appointments appear in Google Calendar. Google Calendar events are considered when computing availability to prevent conflicts.
Can my AI agent handle the entire booking process?
Yes. The agent can list services, show resources, check availability, collect attendee information, and complete the booking — all conversationally, without the customer needing to visit a separate page.
What calendars can I import via iCal?
Any platform that provides an iCal URL — Outlook, Apple Calendar, Calendly, Google Calendar (external accounts), and most scheduling tools.
Can I set different schedules for different resources?
Yes. In Team mode, each resource has its own weekly schedule with custom hours and break times. In Pool mode, the system takes the union of all resource schedules.
Can I move an appointment to a different calendar?
Not currently. Appointments are tied to the calendar they were created in.
Do calendar configurations carry over across workspaces?
No. Calendar configurations are workspace-scoped. Each workspace has its own calendars, services, resources, and integrations. Learn more about Workspaces.