Workflows
Automate your business with Workflows — Link AI's visual automation engine. Set a trigger, add actions, and let your workflows run on autopilot.
Automate your business with Workflows — Link AI's visual automation engine. Set a trigger, add actions, and let your workflows run on autopilot. When something happens in your business — a new order, a form submission, an appointment booking — your workflow kicks in and handles the rest.
What Are Workflows?
Workflows let you build automated sequences that respond to real events in your business. Instead of manually sending a follow-up email after every new order or creating a calendar event after every booking, you set it up once and it runs every time.
Each workflow has two parts:
- A trigger — the event that starts the workflow
- Actions — the steps that execute in order after the trigger fires
You build workflows visually on a canvas. Drag, connect, configure — no code required. Or describe what you want in plain English and let AI build the workflow for you.
Triggers
A trigger is the event that starts your workflow. Every workflow has exactly one trigger. When that event occurs in your workspace, the workflow fires automatically.
Available Triggers
| Trigger | When it fires |
|---|---|
| New Order | A customer places a new order |
| Order Status Changed | An order's status is updated (e.g., pending to completed) |
| New Appointment | A new appointment is booked through your calendar |
| Appointment Status Changed | An appointment is confirmed, cancelled, or rescheduled |
| New Contact | A new contact is added to your workspace |
| Form Submitted | Someone submits one of your Smart Forms |
| New Ticket | A customer support ticket is created |
| Scheduled (Recurring) | Runs on a schedule — choose specific days of the week, time, and timezone |
monday.com
Requires the monday.com integration to be connected.
| Trigger | When it fires |
|---|---|
| Item created | A new item is added to the selected board. |
| Status changed | A status column value changes on the selected board. |
Trigger Filters
Some triggers support filters to narrow when the workflow fires. For example, you can set a form submission trigger to only fire for a specific form, or an order trigger to only fire for orders from a specific agent.
Trigger Variables
Every trigger comes with data you can use in your actions. These are called variables and use the {{variable}} syntax. For example:
- A New Order trigger gives you
{{orderId}},{{customerName}},{{customerEmail}},{{totalAmount}}, and more - A Form Submitted trigger gives you
{{formName}},{{submissionData}}, and the submitted field values - A New Appointment trigger gives you
{{attendeeName}},{{attendeeEmail}},{{startTime}},{{serviceName}}, and more
Variables are available in every action that comes after the trigger. You can insert them into email bodies, AI prompts, HTTP request payloads — anywhere you need dynamic data.
Actions
Actions are the steps your workflow executes after the trigger fires. They run in order, one after another, and each action can use data from the trigger and from previous actions.
Timing
| Action | What it does |
|---|---|
| Wait | Pause the workflow for a set duration before continuing to the next step. Useful for delays like "wait 30 minutes before sending a follow-up." |
| Wait for Approval | Pause the workflow until a human approves or rejects. Ally or your dashboard can handle the approval. The workflow resumes based on the decision. |
Messaging
| Action | What it does |
|---|---|
| Send Email via Gmail | Send an email using your connected Gmail account. Configure the recipient, subject, and body — all with variable support. |
AI
| Action | What it does |
|---|---|
| Trigger Agent | Route context to one of your AI agents. The agent processes the information and returns a response you can use in later steps. |
| Send to Ally | Send a message to your personal Ally assistant. Ally can process information, take actions, or provide analysis. |
| AI Transform | Summarize, rewrite, extract, or analyze text with AI. Feed in data from previous steps and get structured output back. |
| AI Decision | Let AI classify or route based on content. The AI evaluates the input and returns a decision you can use in conditions for later steps. |
Stripe
| Action | What it does |
|---|---|
| Create Invoice | Create and send a Stripe invoice. Configure the customer, line items, and amount using variables from the trigger. |
| Create Payment Link | Generate a Stripe payment link. Great for sending payment requests after a booking or order. |
| Action | What it does |
|---|---|
| Create Calendar Event | Add an event to your connected Google Calendar. Set the title, time, description, and attendees using workflow variables. |
| Cancel Calendar Event | Delete or cancel an existing Google Calendar event. |
Research
| Action | What it does |
|---|---|
| Web Search | Search the web and return results. Use this to look up information, verify data, or gather context for AI actions downstream. |
Data
| Action | What it does |
|---|---|
| Change Order Status | Update the status of an order in your workspace. Useful for automating order processing flows. |
monday.com
Requires the monday.com integration to be connected.
| Action | What it does |
|---|---|
| Create item | Adds a new item to a board, optionally in a specific group, with column values filled in. |
| Update item columns | Updates one or more column values on an existing item. |
| Move item to group | Moves an item to a different group on the same board. |
| Post update | Adds an update (comment) to an existing item. |
Integrations
| Action | What it does |
|---|---|
| HTTP Request | Call any external webhook or API. Configure the URL, method, headers, and body. Perfect for connecting to tools that aren't natively integrated. |
Conditions
Each action can have conditions that determine whether it runs. Conditions evaluate data from the trigger and previous steps.
A condition has three parts:
- Field — the variable to check (e.g.,
totalAmount,status,customerEmail) - Operator — how to compare (
equals,not equals,greater than,less than,contains) - Value — what to compare against
When an action has multiple conditions, all of them must be true for the action to run. If an action has no conditions, it always runs.
Example: Only send a Stripe invoice if
{{totalAmount}}is greater than100.Example: Only trigger the agent if
{{status}}equalscompleted.
Variable Interpolation
Variables make workflows dynamic. Instead of hardcoding values, you reference data from the trigger and from previous steps.
Trigger Variables
These come from the event that started the workflow:
{{orderId}},{{customerName}},{{customerEmail}},{{totalAmount}}{{attendeeName}},{{startTime}},{{serviceName}}{{formName}},{{submissionData}}{{contactName}},{{contactEmail}}
Step Output Variables
Actions can produce output that becomes available to all downstream steps:
{{stripe_invoice_url}}— from the Create Invoice action{{stripe_payment_link}}— from the Create Payment Link action{{ai_summary}}— from the AI Transform action{{ai_decision}}— from the AI Decision action{{approval_status}}— from the Wait for Approval action (approvedorrejected){{agent_response}}— from the Trigger Agent action{{search_results}}— from the Web Search action
Use these variables anywhere in downstream action configurations — email bodies, API payloads, AI prompts, conditions, and more.
The Visual Editor
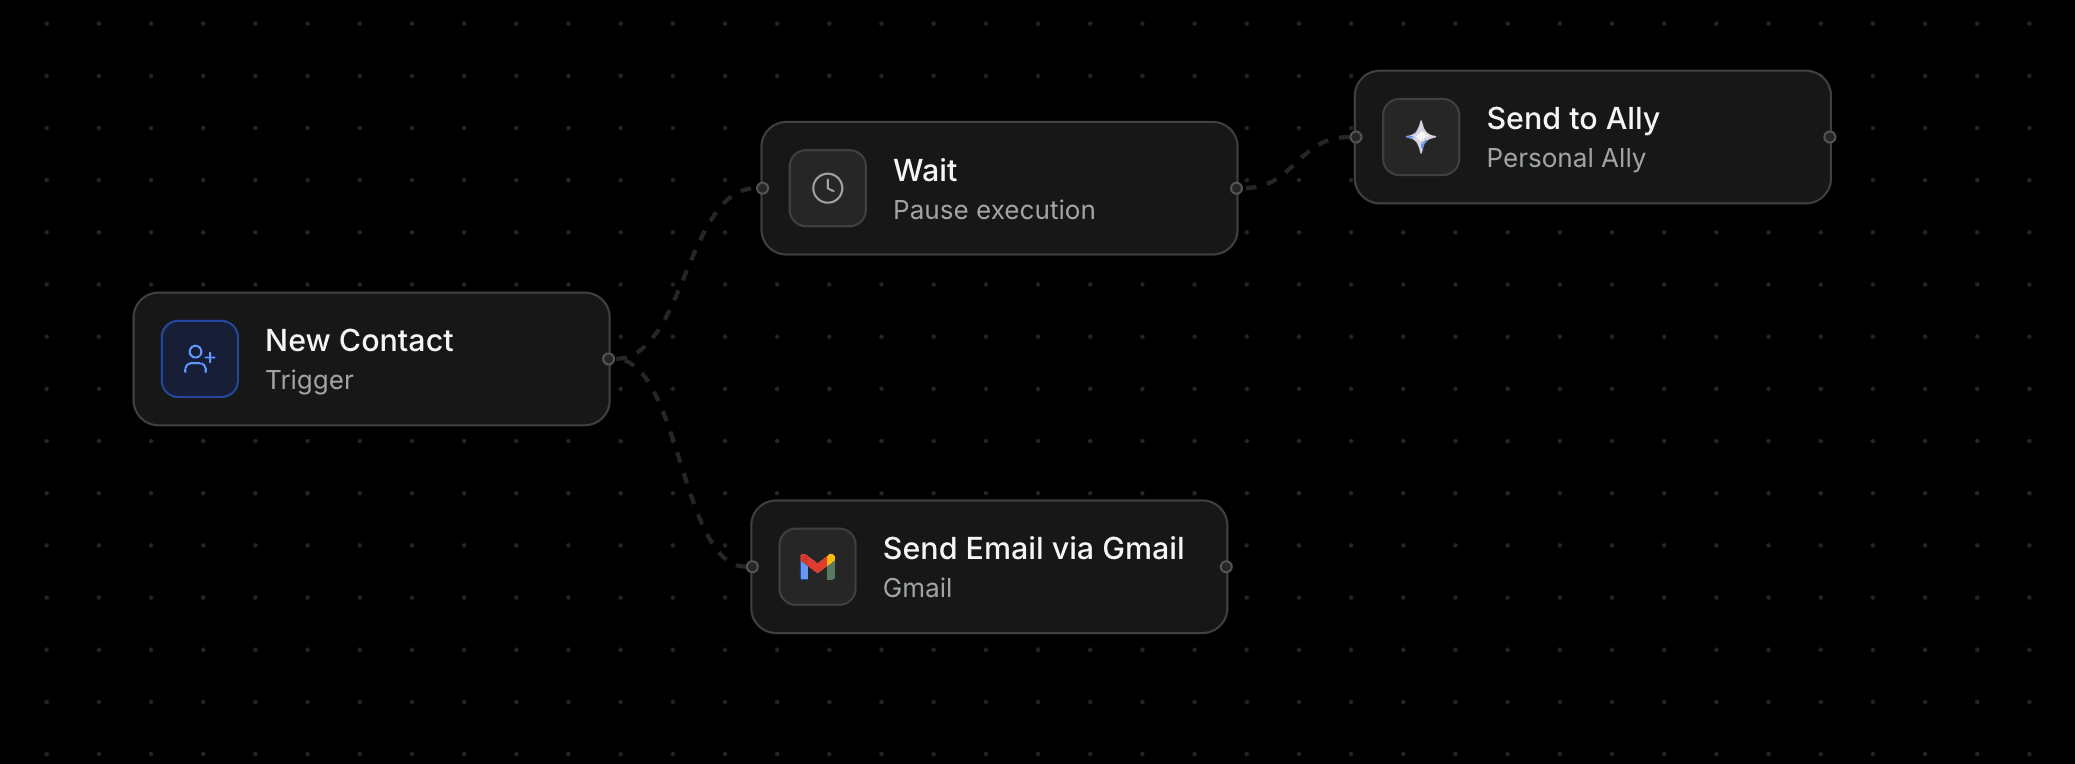
Canvas
The workflow editor is a visual canvas powered by React Flow. Your trigger appears on the left, and actions flow to the right in a connected chain.
- Click a node to open its configuration panel on the right
- Add nodes using the "Add Step" button in the toolbar or by clicking the "+" placeholder between nodes
- Delete nodes by selecting them and clicking the delete button in the toolbar
- Undo/Redo changes with the toolbar buttons or keyboard shortcuts
- Zoom and pan to navigate larger workflows
- Minimap in the corner for orientation in complex workflows
Toolbar
The toolbar at the top gives you quick access to:
- Workflow selector — switch between your workflows or create a new one
- Settings — rename, duplicate, or delete the workflow
- Add Step — add a new action node
- Undo / Redo — step backward or forward through changes
- Save — save the current workflow (unsaved changes are indicated with a dot)
- Active / Paused — toggle the workflow on or off
- Run — trigger a test run to verify everything works
Node Configuration
Click any node to open its configuration panel:
- Trigger nodes — select the trigger type and configure filters (e.g., which form, which agent)
- Action nodes — select the action type, configure its settings, and optionally add conditions
- Variable insertion — available variables are listed and can be inserted into any text field
AI Workflow Generation
Don't want to build it manually? Describe what you want in plain English and AI will build the workflow for you.
How it works
- Click the AI prompt input at the bottom of the canvas (or press
Cmd+K/Ctrl+K) - Describe your workflow in natural language
- Press Enter
"When a new order comes in, wait 10 minutes, then send a thank-you email to the customer"
"Every Monday at 9am, search the web for industry news and send a summary to Ally"
"When a form is submitted, use AI to classify the request, and if it's urgent, create a support ticket"
AI generates the full workflow — trigger, actions, and configuration. It appears on the canvas ready for you to review and adjust.
What you can do with AI
- Generate from scratch — describe the entire workflow on an empty canvas
- Extend existing workflows — add steps to a workflow that's already in progress
- Modify workflows — describe changes and AI will update the workflow
Run History
Every time a workflow executes, it creates a run. You can view the full history of runs for any workflow.
Viewing Runs
- Open a workflow in the editor
- Click into the run history from the workflow page
Each run shows:
- Status — Completed (green), Failed (red), Running (blue), or Waiting (yellow)
- Run ID — unique identifier for the execution
- Triggered at — when the workflow was triggered
- Trigger payload — the full data that triggered the run (expand to view)
Run Statuses
| Status | What it means |
|---|---|
| Completed | The workflow ran all steps successfully |
| Failed | A step encountered an error and the workflow stopped |
| Running | The workflow is currently executing |
| Waiting | The workflow is paused (e.g., waiting for approval or a timed delay) |
Scheduled Workflows
The Scheduled (Recurring) trigger lets you run workflows on a set schedule without any external event.
Configuration
- Days of the week — select which days the workflow should run (e.g., Monday through Friday)
- Time — choose the time of day (e.g., 9:00 AM)
- Timezone — select your timezone (Eastern, Central, Mountain, Pacific, UTC, and more)
Use Cases
- Daily reports — Every morning, pull your business metrics and send a summary email
- Weekly outreach — Every Monday, search for leads and send personalized emails
- Recurring maintenance — Every Friday at 5 PM, generate a weekly wrap-up with AI and send it to Ally
Example Workflows
Here are some real workflows you can build:
Order Follow-Up
Trigger: New Order
- Wait 30 minutes
- AI Transform — generate a personalized thank-you message using the customer's name and order details
- Send Email via Gmail — send the thank-you email to
{{customerEmail}}
Appointment Confirmation with Calendar Sync
Trigger: New Appointment
- Create Calendar Event — add the appointment to your Google Calendar with attendee details
- Send Email via Gmail — send a confirmation email with the appointment time and Google Meet link
Form Submission Triage
Trigger: Form Submitted
- AI Decision — classify the submission as "Sales Lead," "Support Request," or "General Inquiry"
- Conditions on next steps:
- If
{{ai_decision}}equals "Sales Lead" → Send to Agent (sales agent) - If
{{ai_decision}}equals "Support Request" → Create a support ticket - If
{{ai_decision}}equals "General Inquiry" → Send Email via Gmail with an auto-response
- If
Invoice After Booking
Trigger: New Appointment
- Create Invoice — generate a Stripe invoice for the service price, sent to
{{attendeeEmail}} - Send Email via Gmail — send a booking confirmation with the invoice link
Weekly Business Digest
Trigger: Scheduled (Recurring) — Every Monday at 8:00 AM
- Send to Ally — "Give me a summary of last week's orders, appointments, and open tickets"
- AI Transform — format Ally's response into a clean email digest
- Send Email via Gmail — send the digest to your inbox
Human-in-the-Loop Approval
Trigger: New Order (where total > $500)
- Wait for Approval — notify you that a high-value order needs review
- If
{{approval_status}}equals "approved":- Change Order Status to "confirmed"
- Send Email via Gmail — confirm the order with the customer
- If
{{approval_status}}equals "rejected":- Change Order Status to "cancelled"
- Send Email via Gmail — notify the customer
Getting Started
Create Your First Workflow
- Go to Dashboard > Workflows in the sidebar
- Click New Workflow (or select it from the workflow dropdown)
- Choose a trigger by clicking the trigger node on the canvas
- Add actions by clicking the "+" node or using the "Add Step" button
- Configure each step by clicking on it and filling in the details
- Click Save
- Toggle the workflow to Active
Or Let AI Do It
- Go to Dashboard > Workflows
- Press
Cmd+K(orCtrl+K) - Describe what you want: "When a new contact is created, send them a welcome email via Gmail"
- Review the generated workflow, adjust if needed
- Save and activate
Tips
- Start simple — begin with a two-step workflow (trigger + one action) and add complexity over time
- Use test runs — click "Run" in the toolbar to test your workflow before activating it
- Check run history — if something isn't working, the run history shows you exactly where it failed
- Use variables everywhere — the more dynamic your workflows, the more useful they become
- Combine AI actions — chain AI Transform, AI Decision, and Trigger Agent to build intelligent automation
FAQ
How many workflows can I have? There's no limit on the number of workflows per workspace. Create as many as you need.
Do workflows run in the background? Yes. Once a workflow is active, it runs automatically whenever the trigger event occurs. You don't need to have the dashboard open.
What happens if a step fails? The workflow stops at the failed step and the run is marked as "Failed." You can check the run history to see what went wrong. Other workflows are not affected.
Can I pause a workflow without deleting it? Yes. Toggle the workflow to "Paused" in the toolbar. It keeps all its configuration but won't fire until you reactivate it.
Can I duplicate a workflow? Yes. Open the workflow settings and click "Duplicate." A copy is created with "(copy)" in the name, paused by default.
Do conditions support OR logic? Currently, all conditions on a step are ANDed — every condition must be true for the step to run. For OR logic, create separate branches or use an AI Decision step to handle the routing.
How does Wait for Approval work?
The workflow pauses and creates an approval request. You can approve or reject from your dashboard or through Ally. The workflow resumes with {{approval_status}} set to "approved" or "rejected," which you can use in conditions on subsequent steps.
Can I use workflows with my AI agents? Absolutely. The "Trigger Agent" action sends data to any of your AI agents. The agent processes it and returns a response you can use in later steps. This is powerful for adding intelligence to your automations.
What timezone do scheduled workflows use? You set the timezone when configuring the schedule trigger. Options include all major US timezones (Eastern, Central, Mountain, Pacific, Alaska, Hawaii), plus London, Paris, Tokyo, Sydney, and UTC.
Can workflows call external APIs? Yes. The HTTP Request action lets you call any external URL with a custom method, headers, and body. This is the escape hatch for integrating with any tool that has an API.
Is there an AI to help me build workflows?
Yes. Press Cmd+K (Mac) or Ctrl+K (Windows) in the workflow editor and describe what you want in plain English. AI will generate the full workflow — trigger, actions, and configuration — ready for you to review and activate.